
Step-by-step instructions for scheduling an event
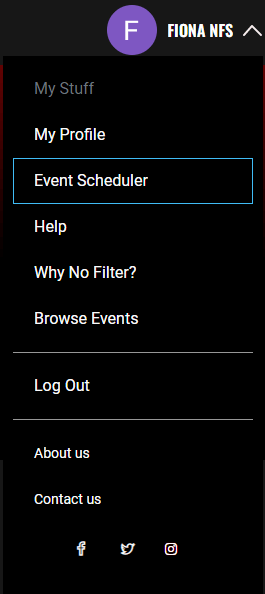
Click on your account logo, in the top right of the No Filter Network homepage, to open your drop-down Account menu.
Select Event Scheduler.
This will open your Event Scheduler, which is made up of four panels.
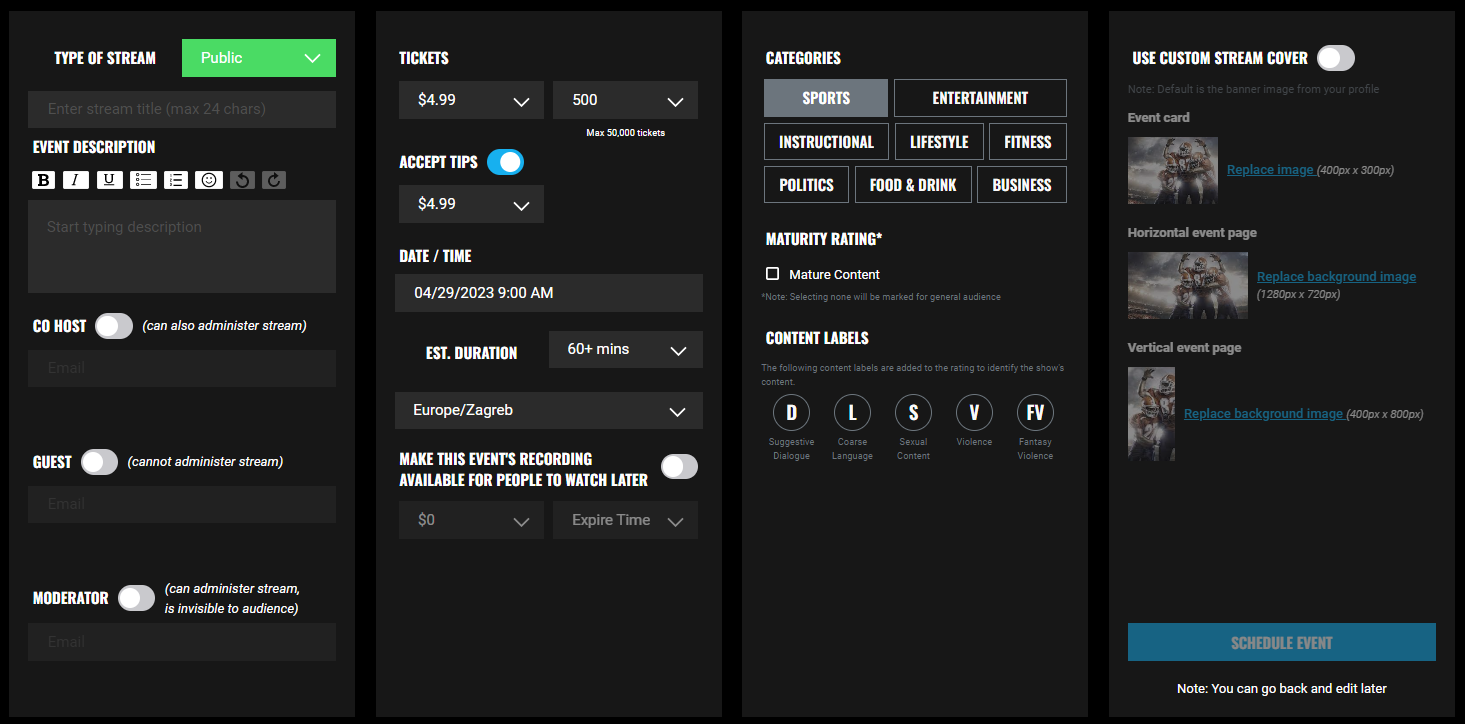
Below, we'll walk you through the fields of each panel.
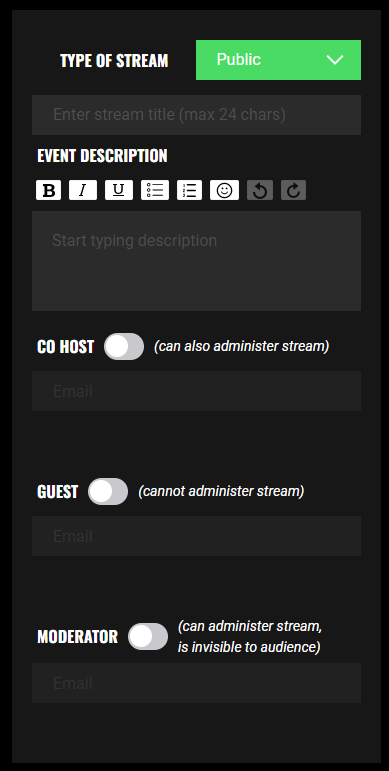
The first panel focusses on the name, description and participants for your event.
Type of Stream: Public or Private
Public event streams are visible to anyone who visits NoFilter.net.
Private event streams can only be accessed by receiving a direct link.
Title of your event
This is a mandatory field and can be up to 24 characters long.
Event description
to help your audience understand what your event is about and why they should attend
Add a co host
You can optionally nominate a co host for the event, by specifying their email address. The event card will also be visible in their profile, so that your joint event can attract not just your fans, but also your co host's fans. Co hosts have exactly the same administrative rights as you during the event - they can start/pause the stream, delete Chat messages and ban attendees from the event. When the event ends, the event will be visible in both your Vault and your co host's Vault.
Add a guest
You can optionally nominate a guest for the event, by specifying their email address. Guests have no administrative privileges during the event and the event will not be visible in their profile.
Add a moderator
You can optionally nominate a moderator for the event, by specifying their email address. A moderator will have exactly the same administrative rights as you during the event - they can start/pause the stream, delete Chat messages and ban attendees from the event, so you can focus on hosting. The moderator is not visible to the audience while you're streaming and the event is not visible in their profile.
When you complete scheduling the event, your nominated co hosts, guests and moderator will automatically be emailed an event invitation.
Note: your co hosts, guests and moderator must already have an account on No Filter Network before you can add them in the Event Scheduler - if they do not, ask them to sign up and then you'll be able to add them.
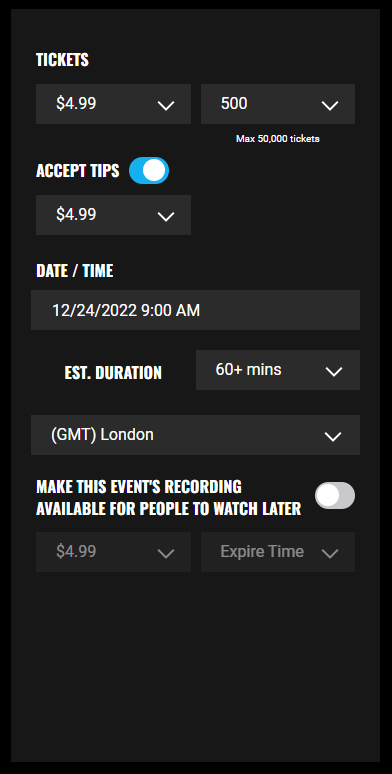
The second panel focusses on the commercials and logistics of your event.
Set the ticket price and expected audience size for your event.
If you want to make the event free, set the ticket price to $0. Note that, if you set a non-zero price for event tickets, we will reach out to you, to set you up in our payments system, so that we can pay you your share of ticket sales and tips after the event!
Toggle whether you want to accept tips
during your event and what the minimum amount viewers can tip you is ($4.99 is the default minimum)
Set the date and time of your event
Don't forget to make sure it's in the right time zone - the default is the time zone that is configured on your device.
Estimate the duration of your event
This is to help the platform with capacity planning. If your event runs longer than this, that's okay, but the platform will not allow your event to exceed a 4 hour duration.
Set whether or not you want to make the event's recording available for purchase in your vault
If you toggle this off, you'll still be able to access your event recording in the Past Streams section of your My Stuff page, but it will not be available to be viewed publicly. If you want to make the replay available for free, set the price to $0.
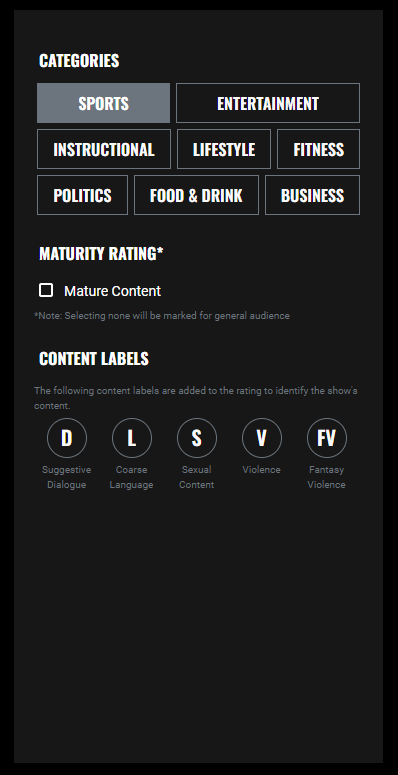
The third panel focusses on categorizing the content of your event.
Categories
Select a category for your event so viewers can find it more easily.
Add a maturity rating
if your stream is meant for adults only. Please note that No Filter Network has a strict policy about what is considered suitable content - refer to our Terms of Service for more information.
Content Labels
Add the appropriate content labels for mature content.
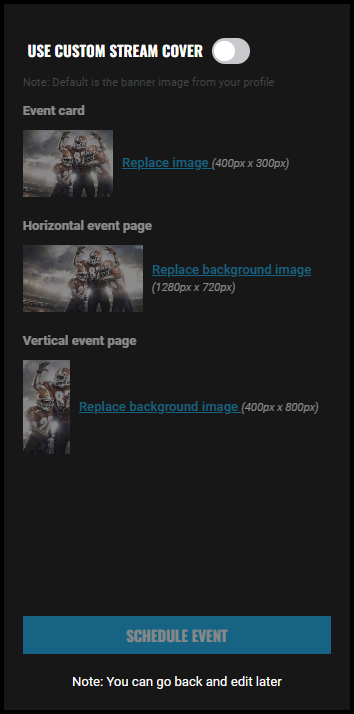
The fourth and last panel focusses on the stream cover that you want to be displayed on your event card and in the background of your event landing page.
By default, your event card and event page background will use the event banner picture you added in your profile.
Use Custom Stream Cover
Toggle this to ON to add a custom background to your event.
Three different aspect ratios are supported:
- 4:3, for your event card
- 16:9, for your event page when viewed horizontally, e.g. on a laptop or desktop computer
- 1:2, for your event page when viewed vertically, e.g. on a mobile device
Click on Replace image
to browse through your files and select a custom background image for your event
Select SCHEDULE EVENT
to finish scheduling your event and see your new event landing page
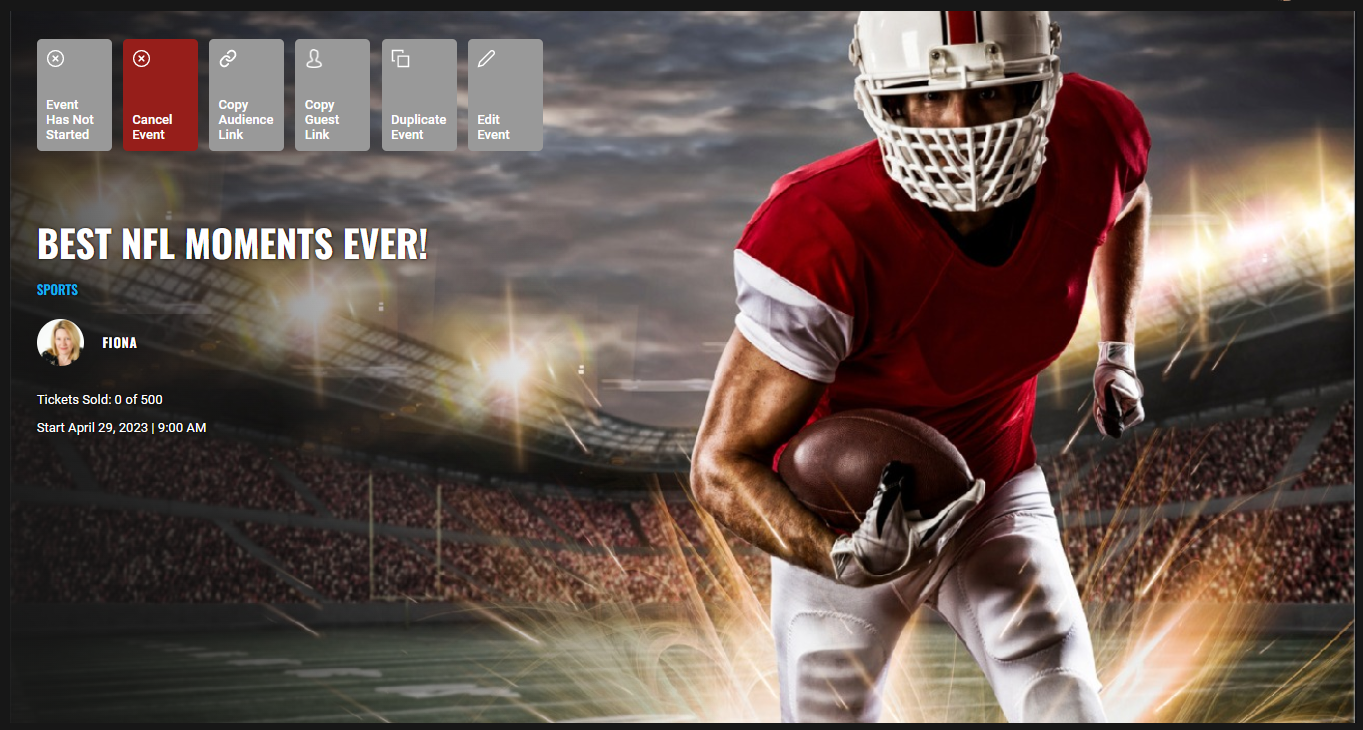
Promote your event
On the landing page of your new event, click on Copy Audience Link to take a copy of the link for your event. Then simply paste that link into any posts/blogs/social media channels you wish to publicize your event on.
Anyone who wants to attend your event can simply click on the link to be taken straight to your event page, where they can register/buy a ticket and join the audience of your event!
You can also click on Copy Guest Link to take a copy of a special link that you can send to people you want to join you on camera in your show. When your guest clicks on this, they will be able to join you in the green room and in the stream.